✓ Royal Mail Authorised Inspector since 2008 | Trading since 2005


iX-1 Series Printing Support
Mailcoms iX-1 Series · Printing
How to clean and change the ink cartridge, align and clean the printhead and fix print problems on the Mailcoms iX-1 Series franking machine.
Cleaning The Ink Cartridge to Fix Problems
Learn how to effectively clean your iX-1 Series franking machine ink cartridge to resolve any issue for no print, half print & poor print problems. Some times you will face issues with your ink cartridge where it will not print despite having ink in the cartridge.
Items Required
• Faulty Ink cartridge
• Warm damp cloth (Folded)
• Tissue Paper / Kitchen Roll (Folded)
• Mug of boiling hot water
Resolution:
Watch this video to learn how to effectively clean your iX-1 Series franking machine ink cartridge.
1. Remove your ink cartridge from the franking machine.
2. Press the ink cartridge down onto folded tissue to see if the ink flows.
3. Place the tip of the printhead into boiling water and hold it there for around 30 seconds.
4. Press the ink cartridge down onto a warm damp cloth for around 10 seconds.
5. Press the ink cartridge onto the tissue once again to check the ink flow.
6. You are aiming to get 2 parallel tram lines.
7. Place the ink cartridge back in your machine and run a test print.
If the problem persists repeat the process.
The ink cartridge for printing is located in the mailing system and contains ink that has been tested and approved by the postal service.
The ink cartridge uses ink jet technology. It requires the print head nozzles to be cleaned regularly to provide a good printing quality. The system performs cleaning automatically or on your request. You can also clean the head manually if the automatic cleaning is not sufficient.
Fixing Ink Printing Problems
The ink cartridge in the iX-1 Series is manufactured using a HP45 ink cartridge. This sometimes needs maintenance usually caused by either clogged up nozzles caused by paper dust or it can dry out if not used for a period of time. To resolve the problem try performing the following:
1. Remove the ink cartridge by pressing ‘Menu’ then scroll to ‘Cartridge’ and press ‘OK’, then scroll to ‘Remove’ and press ‘OK’. Remove the Cartridge.
2. Holding a few sheets of tissue paper against the head hold the cartridge so the brass print head is pointing down and away from you and shake well. ( INK MAY LEAK SO USE WITH CAUTION !!)
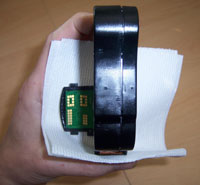
3. Check to see if the ink is flowing well. You should see a sets of solid ‘tram’ lines like this:

4. If you see the similar to the image below, either no ink or broken ‘tram’ lines try the process again.

5. If the problem persists try cleaning the brass print heads with a cloth & some warm soapy water then repeat the process above.
Wiping & rubbing the cartridge contacts to clear possible messages such as “Not Registering” or “No Cartridge Found”
Learn how to effectively clean the contacts on the iX-1 Series ink cartridge to clear possible messages such as “Not Registering” or “No Cartridge Found”.
Items Required
• Ink cartridge with dirty contacts
• Rubber or;
• Alcohol Wipe
Resolution:
Watch this video to learn how to effectively clean the contacts on the iX-1 Series ink cartridge.
1. Remove the ink cartridge from the franking machine.
2. Clean the contacts on the ink cartridge very carefully using a rubber or the alcohol wipe provided.
3. Dry off or wipe any residue.
4. Reinsert the ink cartridge and into the franking machine and test again.
Displaying Ink Level and Cartridge Data
You can display the ink level and other cartridge data, such as:
• Ink consumed in percent.
• Ink color.
• Cartridge status (present or not present).
• First used date.
• Check the Best before date on the cartridge box. After this date, the cartridge warranty is void.
How to Display Ink Level and Cartridge Data (User)
To display the ink cartridge data logged as User:
1. Press the Menu button.
2. Select Ink Cartridge and press OK.
3. Select Ink Cartridge Information and press OK.
The Ink information screen is displayed.
How to Display Ink Level and Cartridge Data (Supervisor)
To display the ink cartridge data logged as (Supervisor):
1. Press the Menu button.
2. Select Maintenance and press OK.
3. Select Cartridge and press OK.
4. Select Ink Information and press OK.
The Ink information screen is displayed.
Aligning the Printing Head
Align the printing head if there is a gap between the top and the bottom of the imprints. The machine requires you to align the printing head after each cartridge change.
How to Align the Print Heads
To align the print heads logged as Supervisor;
1. Press Menu.
2. Select Maintenance and press OK.
3. Select Ink Cartridge and press OK.
4. Select Headset Alignment and press OK. The Headset alignment screen will show.
5. Insert a piece of paper in the mail path. The system prints a test pattern.
6. Observe the pattern and use the Up / Down keys to select the letter that corresponds to the straightest and complete vertical line (e.g. E).
7. Press OK to validate.
8. Press the back button to go back to the ink cartridge menu after alignment is completed.
Cleaning the Printing Head Automatically
If the printing on envelopes looks unclear or dirty in some way, clean the printing head to restore the head condition.
If the printing head has to be cleaned too often, change the automatic cleaning interval as indicated.
How to Clean the Printing Head Automatically (User)
To clean the printing head automatically logged as User:
1. Press Menu.
2. Select Ink Cartridge and press OK.
3. Select Cleaning process and press OK.
The cleaning starts automatically
How to Clean the Printing Head Automatically (Supervisor)
To clean the printing head automatically logged as Supervisor:
1. Press Menu.
2. Select Maintenance and press OK.
3. Select Ink Cartridge and press OK.
4. Select Cleaning process and press OK.
The cleaning starts automatically.
Cleaning the Printing Head Manually
If automatic cleaning is not sufficient, you can clean the printing head manually.
How to Clean the Printing Head Manually
To clean the printing head manually:
1. Open the cover.
2. Remove the ink cartridge.
3. Clean the head with a soft damp cloth.
4. Put the cartridge back in place.
5. Close the cover.
How to Change the Ink Cartridge (User)
Watch this video to learn how to replace the ink cartridge on your iX-1 Series franking machine.
Follow these steps to replace the ink cartridge when logged in as User:
1. Press Menu.
2. Select the page down button until you see Cartridge and press OK.
3. Select Headset Replacement and press OK.
4. The cartridge moves to the ‘replacement’ position, and the following message is displayed: ‘First remove headset. Press “OK” when new headset is installed’.
5. Open the cover, by pulling it towards you from the top left.
6. Pull on the left side of the blue lever, to unlock the cartridge.
7. Pull the cartridge towards you to disengage it.
8. Remove the protective strips from the new ink cartridge.
9. Insert the new ink cartridge, and then push it forward until it stops.
10. Put the blue lever back into place.
11. Close the cover.
12. Press [OK] to validate.
How to Change the Ink Cartridge (Supervisor)
To change the Ink cartridge logged as Supervisor:
1. Press Menu.
2. Select Maintenance and press OK.
2. Select the page down button until you see Cartridge and press OK.
4. Select Headset Replacement and press OK.
5. The cartridge moves to the ‘replacement’ position, and the following message is displayed: ‘First remove headset. Press “OK” when new headset is installed’.
6. Open the cover, by pulling it towards you from the top left.
7. Pull on the left side of the blue lever, to unlock the cartridge.
8. Pull the cartridge towards you to disengage it.
9. Remove the protective strips from the new ink cartridge.
10. Insert the new ink cartridge, and then push it forward until it stops.
11. Put the blue lever back into place.
12. Close the cover.
13. Press [OK] to validate.
iX-1 Series Printing Support – Frequently Asked Questions
How do I fix no print or poor print on the iX-1 Series?
Clean the ink cartridge: press the printhead onto folded tissue, dip the tip in hot water for around 30 seconds, press onto a warm damp cloth, then test until you see two solid tram lines.
How do I change the ink cartridge on the iX-1 Series?
Press Menu, select Cartridge then Headset Replacement, open the cover, release the blue lever, remove the old cartridge, fit the new one, close the cover and press OK.
How do I align the printhead on the iX-1 Series?
As Supervisor press Menu, Maintenance, Ink Cartridge, Headset Alignment, print the test pattern and select the letter with the straightest vertical line, then press OK.
Still having printing problems with your iX-1 Series?
Our technical team are Royal Mail Authorised Inspectors and fully qualified franking machine engineers. Call us on 01543 572 776 – Mon–Fri 9:00 to 17:00.