✓ Royal Mail Authorised Inspector since 2008 | Trading since 2005


Franking Machines
How do franking machines work?
A franking machine weighs your mail, applies the correct postage as a printed impression, and lets you drop it straight in the post. Here is how the whole process works, step by step.
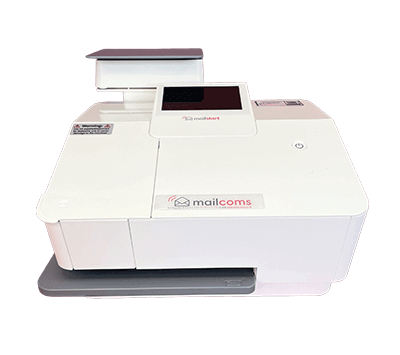
Franking machines have been around for a long time, over 90 years in fact. They have been helping businesses of all sizes when sending their mail, making the entire process quicker and more efficient. However, not every business in the UK uses one. If you are new to this way of sending mail, or simply have no clue how a franking machine works, this guide is for you.
Below, our simple guide (using our entry level Mailstart franking machine) walks you through using a franking machine, from weighing your mail to popping it into the post box.
See it at a glance
A franking machine works in six simple steps: weigh the item, choose the postal service, add an optional message, let the machine calculate the exact postage, frank the item, then post it.
How does franking work? Step by step
Weigh it
Place your letter or parcel on the built-in scale. Exact weight means the correct postage.
Choose your service
Select the size and service you want to use. Your mail, your choice.
Add your message
Add a message to show on your letter or parcel and promote your business at no extra cost.
Automatic postage
The franking machine calculates the exact postage automatically, every time, with Royal Mail franking discounts applied.
Frank it
Feed an envelope or label into the printer slot to frank it, including the postage, date, your logo and the 2D barcode.
Post it
Post your mail in a post box using a late-meter posting envelope, a business posting box, or your local Post Office. That is all there is to it.
How a franking machine works in 6 steps
1
Place your letter or parcel on the scales
First, place your letter or parcel onto the scales. Every franking machine comes with scales, either integrated into the machine (as in the example) or separate. Either way, weighing your item gives you the exact weight, and exact weight means correct postage.
2
Select the size & service
Using the franking machine’s navigation menu, select the exact size and service you want to use. Within a few clicks you have chosen your options. Your mail, your choice.
3
Add a message or logo
A useful benefit of a franking machine is that you can add a personalised message and/or logo onto your outgoing items. This gives your mail a professional finish and helps increase brand awareness, promoting your business at no extra cost.
4
Calculate the exact postage
Next, the machine calculates the postage of the item you are sending. Using the weighing scales, it ensures the exact postage is paid every time, automatically, reducing the risk of mispaying. By benefitting from Royal Mail’s lower Mailmark postage rates you also make huge franking savings at the same time.
5
Insert your envelope or label
Next, insert your envelope or franking label (for larger parcels and packets). Every franking machine has a feeder and slot for envelopes and labels. The machine then applies a franking impression which includes the postage amount, date, company logo or message and a 2D barcode.
6
Pop your mail into a post box
Finally, with your item franked, repeat the process for everything you are sending that day. Then take them to your local post office, a business posting box, or a regular post box using meter posting envelopes. That is all there is to the franking process.
Ready to make franking simple?
Get an instant franking machine quote, or call our team on 01543 572 776.